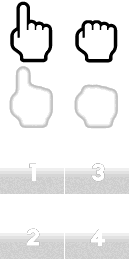
Pointer
(Current scale is below 100% - zoom in to view full detail)
| Asset Info favorite | |
|---|---|
| Name | Pointer |
| Category | Wii |
| Game | Wii Menu |
| Section | Miscellaneous |
| Submitted | December 24, 2021 |
| Uploaded By | SuperPupperDoggo |
| Size | 8.14 KB (129x259) |
| Format | PNG (image/png) |
| Hits | 10,778 |
Animated GIFs (0)
Comments (4)
You must be logged in to post comments.

@person6423_ I don't use paint.net but I assume there should be some way to right click and apply it (or if it's a filter of sorts.)

btw do you know how to make a clipping mask in paint.net??
@SIG7Pro you're a friggin legend
How to assemble the cursors. (Should also work for Wii U titles.)
1. Get the area with the number on it. (1, 2, 3, or 4.)
2. Make that into a new layer and drag it over the cursor.
3. Set that to be a clipping mask with the "Screen" filter on it.
4. Get one of the cursor colors. (https://www.spriters-resource.com/wii_u/systembios/sheet/149187/ is a good shortcut for color grabbing)
With the color, draw a rectangle over the cursor but below the gradient with the number. Set this to have a clipping mask. (Normal filter.)
5. Duplicate the cursor and move it to the very top, make it have a clipping mask and apply the "Darken" filter over it.
When assembled properly, it should look like the following:
 (P1 Cursor)
 (P1 Cursor Grab)
https://www.photopea.com/#iF-sADuFw (P1 Cursors, assembled and layered in the same method as instructed. Should be up for six months, but if it doesn't exist anymore, feel good to know that I gave instructions on how to do what I did.)
(Edit: Inst No. 4 looks broken, Idk how 2 fix.)
(Edit 2: I found out how to custom image.)
1. Get the area with the number on it. (1, 2, 3, or 4.)
2. Make that into a new layer and drag it over the cursor.
3. Set that to be a clipping mask with the "Screen" filter on it.
4. Get one of the cursor colors. (https://www.spriters-resource.com/wii_u/systembios/sheet/149187/ is a good shortcut for color grabbing)
With the color, draw a rectangle over the cursor but below the gradient with the number. Set this to have a clipping mask. (Normal filter.)
5. Duplicate the cursor and move it to the very top, make it have a clipping mask and apply the "Darken" filter over it.
When assembled properly, it should look like the following:
(P1 Cursor) (P1 Cursor Grab)https://www.photopea.com/#iF-sADuFw (P1 Cursors, assembled and layered in the same method as instructed. Should be up for six months, but if it doesn't exist anymore, feel good to know that I gave instructions on how to do what I did.)
(Edit: Inst No. 4 looks broken, Idk how 2 fix.)
(Edit 2: I found out how to custom image.)