disabled_by_defaultDue to increasing levels of AI scraping putting incredible strain on server resources but Cloudflare's under attack mode being a bit too heavy-handed to leave up 24/7, we're trying a new way to combat these attacks. By default, all traffic will be challenged but logged in users will bypass those challenges completely. We apologize for any inconvenience this may cause as it was never our intention to try to force registration and you certainly still don't have to - passing one of those challenges should keep you in the clear for a half-hour otherwise.

Ema Skye


User Information
Avatar Name Ema Skye
Group Members
Registered May 21, 2020
Status Active
Contact
Largest Contributions
Harvest Moon
Harvest Moon - Harvest Moon
59 assets
Most Popular Assets
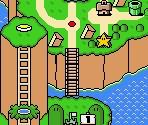
1 World Map
SNES - Super Mario World
107,636 hits
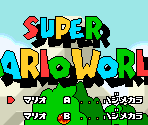
2 Title Screen
SNES - Super Mario World
78,670 hits
3 World Map (Spriteless)
SNES - Super Mario World
54,208 hits
4 World Map (Spriteless, Alternate Palette)
SNES - Super Mario World
40,025 hits
5 World 1-1
SNES - Super Mario All-Stars: Super Mario Bros. & The Lost Levels
20,750 hits
6 Introduction
SNES - Super Mario RPG: Legend of the Seven Stars
18,203 hits
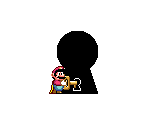
7 Keyhole Effect
SNES - Super Mario World
17,375 hits
8 #1 Iggy's Castle (1/2)
SNES - Super Mario World
15,416 hits
9 World 1-1
SNES - Super Mario All-Stars: Super Mario Bros. 3
15,093 hits
10 Item Roulette
SNES - Super Mario Kart
14,039 hits

All Assets (716)arrow_drop_down


arrow_drop_down [1] Custom / Edited
arrow_drop_down [26] Game Boy Advance
arrow_drop_down [5] NES
arrow_drop_down [3] PC / Computer
arrow_drop_down [12] Sega Genesis
arrow_drop_down [669] SNES
Hills
Hills - 3 Ninjas Kick Back
Level 1-1: The Woods
Level 1-1: The Woods - 3 Ninjas Kick Back
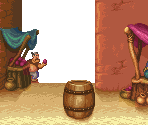
Stage 1-1
Stage 1-1 - Aladdin
Accordion Owl
Accordion Owl - Alice no Paint Adventure (JPN)
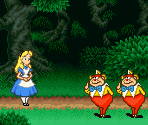
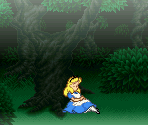
Alice
Alice - Alice no Paint Adventure (JPN)
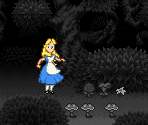
Bushes Area
Bushes Area - Alice no Paint Adventure (JPN)
Castle Garden
Castle Garden - Alice no Paint Adventure (JPN)
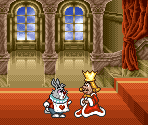
Castle Main Hall
Castle Main Hall - Alice no Paint Adventure (JPN)
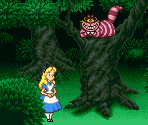
Cat Area
Cat Area - Alice no Paint Adventure (JPN)
Coloring Mode Drawings
Coloring Mode Drawings - Alice no Paint Adventure (JPN)
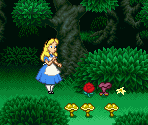
Flowers Area
Flowers Area - Alice no Paint Adventure (JPN)
Flowers Area (Black and White)
Flowers Area (Black and White) - Alice no Paint Adventure (JPN)
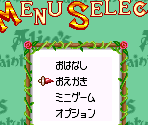
Main Menu
Main Menu - Alice no Paint Adventure (JPN)
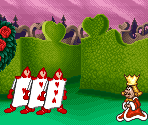
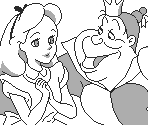
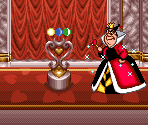
Queen's Room
Queen's Room - Alice no Paint Adventure (JPN)
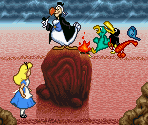
Rocks Area
Rocks Area - Alice no Paint Adventure (JPN)
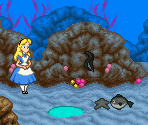
Sea (With Water)
Sea (With Water) - Alice no Paint Adventure (JPN)
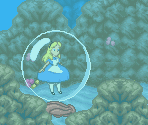
Sea (Without Water)
Sea (Without Water) - Alice no Paint Adventure (JPN)
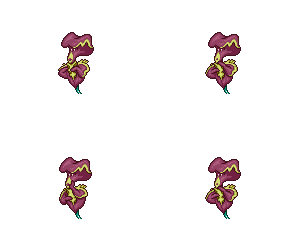
Snooty Iris
Snooty Iris - Alice no Paint Adventure (JPN)
Start Area
Start Area - Alice no Paint Adventure (JPN)
Start Area (Black and White)
Start Area (Black and White) - Alice no Paint Adventure (JPN)
Stone Street 1
Stone Street 1 - Alice no Paint Adventure (JPN)
Tea Party Area
Tea Party Area - Alice no Paint Adventure (JPN)
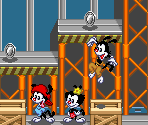
Studio Interior
Studio Interior - Animaniacs
Studio Secret Area
Studio Secret Area - Animaniacs
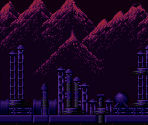
Purple Mountains
Purple Mountains - B.O.B.
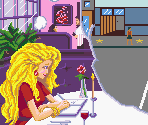
Restaurant Cutscene
Restaurant Cutscene - Barbie Super Model
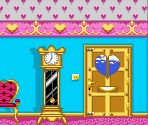
Barbie's House (Main Hall)
Barbie's House (Main Hall) - Barbie: Vacation Adventure (Prototype)
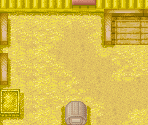
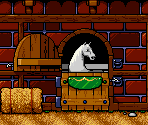
Barn
Barn - Barbie: Vacation Adventure (Prototype)
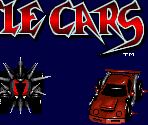
Namco Logo & Title Screen
Namco Logo & Title Screen - Battle Cars
Title Screen & Logos
Title Screen & Logos - Beethoven: The Ultimate Canine Caper
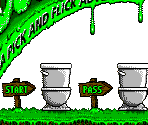
Main Menu
Main Menu - Boogerman: A Pick and Flick Adventure
Vs Mode Icons
Vs Mode Icons - Bust-a-Move / Puzzle Bobble
Start Area
Start Area - Casper
Bungle Jungle
Bungle Jungle - Clay Fighter 2: Judgement Clay
Camp Catastrophe
Camp Catastrophe - Clay Fighter 2: Judgement Clay
Clay Keep
Clay Keep - Clay Fighter 2: Judgement Clay
The Crib
The Crib - Clay Fighter 2: Judgement Clay
Frosty's Workshop
Frosty's Workshop - Clay Fighter 2: Judgement Clay
Mount Mushmore
Mount Mushmore - Clay Fighter 2: Judgement Clay
Mudville Gardens
Mudville Gardens - Clay Fighter 2: Judgement Clay
1-1
1-1 - Congo's Caper
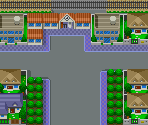
Town
Town - Doraemon: Nobita to Yousei no Kuni (JPN)
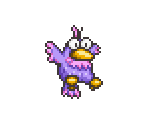
Bird
Bird - DoReMi Fantasy: Milon no Dokidoki Daibouken (JPN)
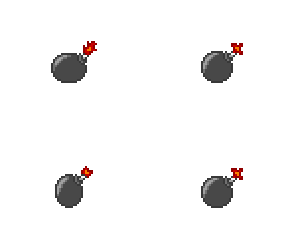
Bomb & Explosions
Bomb & Explosions - DoReMi Fantasy: Milon no Dokidoki Daibouken (JPN)
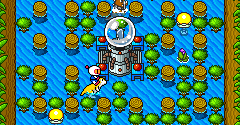
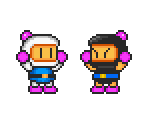
Bombermen
Bombermen - DoReMi Fantasy: Milon no Dokidoki Daibouken (JPN)
Bush
Bush - DoReMi Fantasy: Milon no Dokidoki Daibouken (JPN)
Dr. Memory / Dr. Mitsumori
Dr. Memory / Dr. Mitsumori - DoReMi Fantasy: Milon no Dokidoki Daibouken (JPN)
Forest Background
Forest Background - DoReMi Fantasy: Milon no Dokidoki Daibouken (JPN)
Intro Cutscene
Intro Cutscene - DoReMi Fantasy: Milon no Dokidoki Daibouken (JPN)
Main Menu
Main Menu - DoReMi Fantasy: Milon no Dokidoki Daibouken (JPN)
Stage 1-1
Stage 1-1 - DoReMi Fantasy: Milon no Dokidoki Daibouken (JPN)
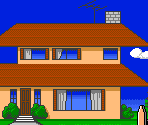
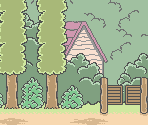
House Exterior
House Exterior - Family Dog
Stage 1
Stage 1 - Go Go Ackman (JPN)
Stage 1
Stage 1 - Goof Troop
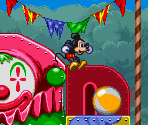
Stage 1: The Haunted Circus - Area 1
Stage 1: The Haunted Circus - Area 1 - The Great Circus Mystery Starring Mickey & Minnie
Stage 1: The Haunted Circus - Area 1 (Backgrounds)
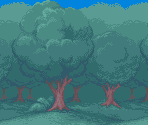
Stage 1: The Haunted Circus - Area 1 (Backgrounds) - The Great Circus Mystery Starring Mickey & Minnie
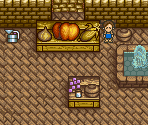
Animal Shop
Animal Shop - Harvest Moon
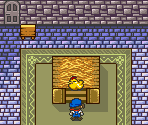
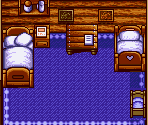
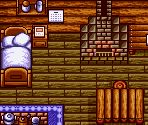
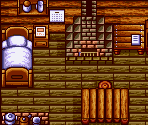
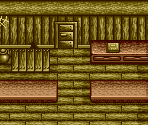
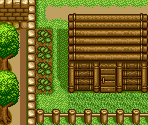
Carpenter's Home
Carpenter's Home - Harvest Moon
Chicken Coop
Chicken Coop - Harvest Moon
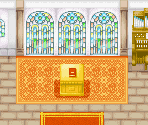
Church
Church - Harvest Moon
Cow Barn
Cow Barn - Harvest Moon
Ending (Corn)
Ending (Corn) - Harvest Moon
Ending (Ellen)
Ending (Ellen) - Harvest Moon
Ending (Nina)
Ending (Nina) - Harvest Moon
Ending (Potato)
Ending (Potato) - Harvest Moon
Ending (Tomato)
Ending (Tomato) - Harvest Moon
Ending (Turnip)
Ending (Turnip) - Harvest Moon
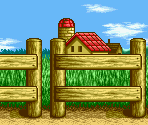
Farm (Fall)
Farm (Fall) - Harvest Moon
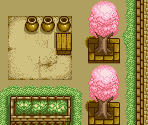
Farm (Spring)
Farm (Spring) - Harvest Moon
Farm (Summer)
Farm (Summer) - Harvest Moon
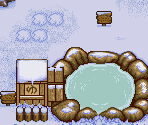
Farm (Winter)
Farm (Winter) - Harvest Moon
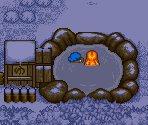
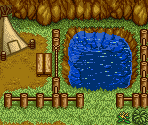
Farm's Cave
Farm's Cave - Harvest Moon
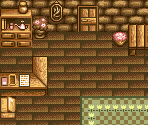
Fortuneteller's Home
Fortuneteller's Home - Harvest Moon
Golden Chicken's Palace
Golden Chicken's Palace - Harvest Moon
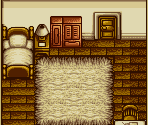
Jack's House (Big)
Jack's House (Big) - Harvest Moon
Jack's House (Medium)
Jack's House (Medium) - Harvest Moon
Jack's House (Small)
Jack's House (Small) - Harvest Moon
Mayor's Home
Mayor's Home - Harvest Moon
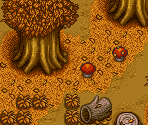
Mountain (Fall)
Mountain (Fall) - Harvest Moon
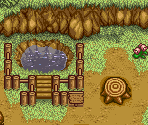
Mountain (Spring)
Mountain (Spring) - Harvest Moon
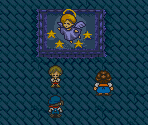
Mountain (Star Night Festival)
Mountain (Star Night Festival) - Harvest Moon
Mountain (Summer)
Mountain (Summer) - Harvest Moon
Mountain (Winter)
Mountain (Winter) - Harvest Moon
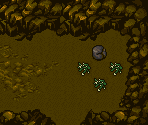
Mountain Cave
Mountain Cave - Harvest Moon
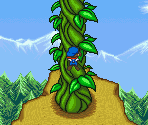
Mountain Top (Beanstalk)
Mountain Top (Beanstalk) - Harvest Moon
Mountain Top (Fall)
Mountain Top (Fall) - Harvest Moon
Mountain Top (Spring)
Mountain Top (Spring) - Harvest Moon
Mountain Top (Star Night Festival)
Mountain Top (Star Night Festival) - Harvest Moon
Mountain Top (Summer)
Mountain Top (Summer) - Harvest Moon
Mountain Top (Winter)
Mountain Top (Winter) - Harvest Moon
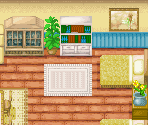
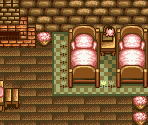
Nina's Room
Nina's Room - Harvest Moon
Opening Cutscene (1/2)
Opening Cutscene (1/2) - Harvest Moon
Opening Cutscene (2/2)
Opening Cutscene (2/2) - Harvest Moon
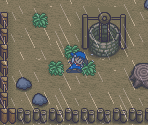
Rain
Rain - Harvest Moon
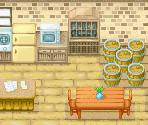
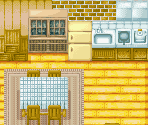
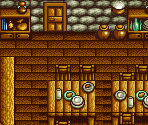
Restaurant
Restaurant - Harvest Moon
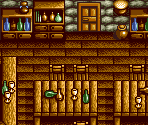
Saloon
Saloon - Harvest Moon
Seed Shop
Seed Shop - Harvest Moon
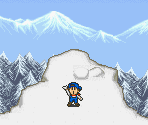
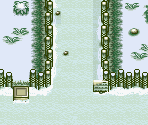
Snow
Snow - Harvest Moon
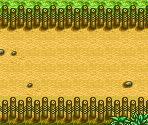
Street (Fall)
Street (Fall) - Harvest Moon
Street (Spring)
Street (Spring) - Harvest Moon
Street (Summer)
Street (Summer) - Harvest Moon
Street (Winter)
Street (Winter) - Harvest Moon
Summer Clouds
Summer Clouds - Harvest Moon
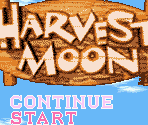
Title Screen (International)
Title Screen (International) - Harvest Moon
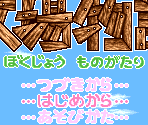
Title Screen (Japan)
Title Screen (Japan) - Harvest Moon
Tool Shed
Tool Shed - Harvest Moon
Tool Shop
Tool Shop - Harvest Moon
Village (Egg Festival)
Village (Egg Festival) - Harvest Moon
Village (Fall)
Village (Fall) - Harvest Moon
Village (Flower Festival)
Village (Flower Festival) - Harvest Moon
Village (Harvest Festival)
Village (Harvest Festival) - Harvest Moon
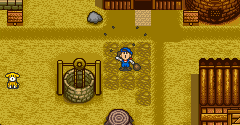
Village (Spring)
Village (Spring) - Harvest Moon
Village (Star Night Festival)
Village (Star Night Festival) - Harvest Moon
Village (Summer)
Village (Summer) - Harvest Moon
Village (Winter)
Village (Winter) - Harvest Moon
Stage 1 - Room 1
Stage 1 - Room 1 - Home Alone
Stage 1 - Room 2
Stage 1 - Room 2 - Home Alone
Stage 1 - Room 3
Stage 1 - Room 3 - Home Alone
Stage 1 - Room 4
Stage 1 - Room 4 - Home Alone
Main Menu
Main Menu - The Incredible Hulk
Title & Credits Screens
Title & Credits Screens - James Bond Jr.
Level 1-1
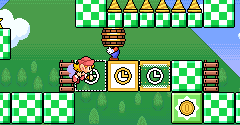
Level 1-1 - Mario & Wario (JPN)
Level 1-10
Level 1-10 - Mario & Wario (JPN)
Level 1-2
Level 1-2 - Mario & Wario (JPN)
Level 1-3
Level 1-3 - Mario & Wario (JPN)
Level 1-4
Level 1-4 - Mario & Wario (JPN)
Level 1-5
Level 1-5 - Mario & Wario (JPN)
Level 1-6
Level 1-6 - Mario & Wario (JPN)
Level 1-7
Level 1-7 - Mario & Wario (JPN)
Level 1-8
Level 1-8 - Mario & Wario (JPN)
Level 1-9
Level 1-9 - Mario & Wario (JPN)
Level 2-1
Level 2-1 - Mario & Wario (JPN)
Level 2-10
Level 2-10 - Mario & Wario (JPN)
Level 2-2
Level 2-2 - Mario & Wario (JPN)
Level 2-3
Level 2-3 - Mario & Wario (JPN)
Level 2-4
Level 2-4 - Mario & Wario (JPN)
Level 2-5
Level 2-5 - Mario & Wario (JPN)
Level 2-6
Level 2-6 - Mario & Wario (JPN)
Level 2-7
Level 2-7 - Mario & Wario (JPN)
Level 2-8
Level 2-8 - Mario & Wario (JPN)
Level 2-9
Level 2-9 - Mario & Wario (JPN)
Level 3-1
Level 3-1 - Mario & Wario (JPN)
Level 3-10
Level 3-10 - Mario & Wario (JPN)
Level 3-2
Level 3-2 - Mario & Wario (JPN)
Level 3-3
Level 3-3 - Mario & Wario (JPN)
Level 3-4
Level 3-4 - Mario & Wario (JPN)
Level 3-5
Level 3-5 - Mario & Wario (JPN)
Level 3-6
Level 3-6 - Mario & Wario (JPN)
Level 3-7
Level 3-7 - Mario & Wario (JPN)
Level 3-8
Level 3-8 - Mario & Wario (JPN)
Level 3-9
Level 3-9 - Mario & Wario (JPN)
Level 4-1
Level 4-1 - Mario & Wario (JPN)
Level 4-10
Level 4-10 - Mario & Wario (JPN)
Level 4-2
Level 4-2 - Mario & Wario (JPN)
Level 4-3
Level 4-3 - Mario & Wario (JPN)
Level 4-4
Level 4-4 - Mario & Wario (JPN)
Level 4-5
Level 4-5 - Mario & Wario (JPN)
Level 4-6
Level 4-6 - Mario & Wario (JPN)
Level 4-7
Level 4-7 - Mario & Wario (JPN)
Level 4-8
Level 4-8 - Mario & Wario (JPN)
Level 4-9
Level 4-9 - Mario & Wario (JPN)
Level 5-1
Level 5-1 - Mario & Wario (JPN)
Level 5-10
Level 5-10 - Mario & Wario (JPN)
Level 5-2
Level 5-2 - Mario & Wario (JPN)
Level 5-3
Level 5-3 - Mario & Wario (JPN)
Level 5-4
Level 5-4 - Mario & Wario (JPN)
Level 5-5
Level 5-5 - Mario & Wario (JPN)
Level 5-6
Level 5-6 - Mario & Wario (JPN)
Level 5-7
Level 5-7 - Mario & Wario (JPN)
Level 5-8
Level 5-8 - Mario & Wario (JPN)
Level 5-9
Level 5-9 - Mario & Wario (JPN)
Level 6-1
Level 6-1 - Mario & Wario (JPN)
Level 6-10
Level 6-10 - Mario & Wario (JPN)
Level 6-2
Level 6-2 - Mario & Wario (JPN)
Level 6-3
Level 6-3 - Mario & Wario (JPN)
Level 6-4
Level 6-4 - Mario & Wario (JPN)
Level 6-5
Level 6-5 - Mario & Wario (JPN)
Level 6-6
Level 6-6 - Mario & Wario (JPN)
Level 6-7
Level 6-7 - Mario & Wario (JPN)
Level 6-8
Level 6-8 - Mario & Wario (JPN)
Level 6-9
Level 6-9 - Mario & Wario (JPN)
Level 7-1
Level 7-1 - Mario & Wario (JPN)
Level 7-10
Level 7-10 - Mario & Wario (JPN)
Level 7-2
Level 7-2 - Mario & Wario (JPN)
Level 7-3
Level 7-3 - Mario & Wario (JPN)
Level 7-4
Level 7-4 - Mario & Wario (JPN)
Level 7-5
Level 7-5 - Mario & Wario (JPN)
Level 7-6
Level 7-6 - Mario & Wario (JPN)
Level 7-7
Level 7-7 - Mario & Wario (JPN)
Level 7-8
Level 7-8 - Mario & Wario (JPN)
Level 7-9
Level 7-9 - Mario & Wario (JPN)
Level 8-1
Level 8-1 - Mario & Wario (JPN)
Level 8-2
Level 8-2 - Mario & Wario (JPN)
Bowser's Castle Room 1
Bowser's Castle Room 1 - Mario is Missing!
Alphabet Room
Alphabet Room - Mario's Early Years!: Fun with Letters
Blocks Room 1
Blocks Room 1 - Mario's Early Years!: Fun with Letters
Blocks Room 2
Blocks Room 2 - Mario's Early Years!: Fun with Letters
Blocks Room 3
Blocks Room 3 - Mario's Early Years!: Fun with Letters
Book Room 1
Book Room 1 - Mario's Early Years!: Fun with Letters
Book Room 2
Book Room 2 - Mario's Early Years!: Fun with Letters
Book Room 3
Book Room 3 - Mario's Early Years!: Fun with Letters
Cinema Room 1
Cinema Room 1 - Mario's Early Years!: Fun with Letters
Cinema Room 2
Cinema Room 2 - Mario's Early Years!: Fun with Letters
Cinema Room 3
Cinema Room 3 - Mario's Early Years!: Fun with Letters
Complete the Sentence Room 1
Complete the Sentence Room 1 - Mario's Early Years!: Fun with Letters
Complete the Sentence Room 2
Complete the Sentence Room 2 - Mario's Early Years!: Fun with Letters
Complete the Sentence Room 3
Complete the Sentence Room 3 - Mario's Early Years!: Fun with Letters
Minigame Select
Minigame Select - Mario's Early Years!: Fun with Letters
Puzzle Room 1
Puzzle Room 1 - Mario's Early Years!: Fun with Letters
Puzzle Room 2
Puzzle Room 2 - Mario's Early Years!: Fun with Letters
Puzzle Room 3
Puzzle Room 3 - Mario's Early Years!: Fun with Letters
Vowels Room 1
Vowels Room 1 - Mario's Early Years!: Fun with Letters
Vowels Room 2-4
Vowels Room 2-4 - Mario's Early Years!: Fun with Letters
Vowels Room 5
Vowels Room 5 - Mario's Early Years!: Fun with Letters
Forest Room 1
Forest Room 1 - Mario's Early Years!: Fun with Numbers
Forest Room 2
Forest Room 2 - Mario's Early Years!: Fun with Numbers
Forest Room 3
Forest Room 3 - Mario's Early Years!: Fun with Numbers
Forest Room 4
Forest Room 4 - Mario's Early Years!: Fun with Numbers
Forest Room 5
Forest Room 5 - Mario's Early Years!: Fun with Numbers
Forest Room 6
Forest Room 6 - Mario's Early Years!: Fun with Numbers
Mario's Kitchen
Mario's Kitchen - Mario's Early Years!: Fun with Numbers
Mario's Room
Mario's Room - Mario's Early Years!: Fun with Numbers
Minigame Select 1
Minigame Select 1 - Mario's Early Years!: Fun with Numbers
Minigame Select 2
Minigame Select 2 - Mario's Early Years!: Fun with Numbers
Night Room 1
Night Room 1 - Mario's Early Years!: Fun with Numbers
Night Room 2
Night Room 2 - Mario's Early Years!: Fun with Numbers
Night Room 3
Night Room 3 - Mario's Early Years!: Fun with Numbers
Night Room 4
Night Room 4 - Mario's Early Years!: Fun with Numbers
Numbers Room 1
Numbers Room 1 - Mario's Early Years!: Fun with Numbers
Numbers Room 2
Numbers Room 2 - Mario's Early Years!: Fun with Numbers
Numbers Room 3
Numbers Room 3 - Mario's Early Years!: Fun with Numbers
Park Room 1
Park Room 1 - Mario's Early Years!: Fun with Numbers
Park Room 2
Park Room 2 - Mario's Early Years!: Fun with Numbers
Park Room 3
Park Room 3 - Mario's Early Years!: Fun with Numbers
Shapes Room 1
Shapes Room 1 - Mario's Early Years!: Fun with Numbers
Shapes Room 2
Shapes Room 2 - Mario's Early Years!: Fun with Numbers
Shapes Room 3
Shapes Room 3 - Mario's Early Years!: Fun with Numbers
Shapes Room 4
Shapes Room 4 - Mario's Early Years!: Fun with Numbers
Street Room 1
Street Room 1 - Mario's Early Years!: Fun with Numbers
Street Room 2
Street Room 2 - Mario's Early Years!: Fun with Numbers
Street Room 3
Street Room 3 - Mario's Early Years!: Fun with Numbers
Street Room 4
Street Room 4 - Mario's Early Years!: Fun with Numbers
Amusement Park Room 1
Amusement Park Room 1 - Mario's Early Years!: Preschool Fun
Amusement Park Room 2
Amusement Park Room 2 - Mario's Early Years!: Preschool Fun
Amusement Park Room 3
Amusement Park Room 3 - Mario's Early Years!: Preschool Fun
Circus
Circus - Mario's Early Years!: Preschool Fun
Farm Room
Farm Room - Mario's Early Years!: Preschool Fun
Mario's Room
Mario's Room - Mario's Early Years!: Preschool Fun
Market Room 1
Market Room 1 - Mario's Early Years!: Preschool Fun
Market Room 2
Market Room 2 - Mario's Early Years!: Preschool Fun
Minigame Select
Minigame Select - Mario's Early Years!: Preschool Fun
School
School - Mario's Early Years!: Preschool Fun
Shapes Room 1
Shapes Room 1 - Mario's Early Years!: Preschool Fun
Shapes Room 2
Shapes Room 2 - Mario's Early Years!: Preschool Fun
Shapes Room 3
Shapes Room 3 - Mario's Early Years!: Preschool Fun
Title Screen Background
Title Screen Background - Mario's Early Years!: Preschool Fun
Bowser's Castle Room 1
Bowser's Castle Room 1 - Mario's Time Machine
Intro and Menu
Intro and Menu - Mario's Time Machine
Scene 01
Scene 01 - Mr. Do!
Scene 02
Scene 02 - Mr. Do!
Scene 03
Scene 03 - Mr. Do!
Scene 04
Scene 04 - Mr. Do!
Scene 05
Scene 05 - Mr. Do!
Scene 06
Scene 06 - Mr. Do!
Scene 07
Scene 07 - Mr. Do!
Scene 08
Scene 08 - Mr. Do!
Scene 09
Scene 09 - Mr. Do!
Scene 10
Scene 10 - Mr. Do!
Scene 11
Scene 11 - Mr. Do!
Scene 12
Scene 12 - Mr. Do!
Scene 13
Scene 13 - Mr. Do!
Scene 14
Scene 14 - Mr. Do!
Scene 15
Scene 15 - Mr. Do!
Scene 16
Scene 16 - Mr. Do!
Scene 17
Scene 17 - Mr. Do!
Cliff
Cliff - Pac-Man 2: The New Adventures
Department Store
Department Store - Pac-Man 2: The New Adventures
Fountain Way
Fountain Way - Pac-Man 2: The New Adventures
Game Center
Game Center - Pac-Man 2: The New Adventures
Industrial Area
Industrial Area - Pac-Man 2: The New Adventures
Lucy's Room
Lucy's Room - Pac-Man 2: The New Adventures
Main Menu
Main Menu - Pac-Man 2: The New Adventures
Main St.
Main St. - Pac-Man 2: The New Adventures
Old Arcade
Old Arcade - Pac-Man 2: The New Adventures
Old Game Center
Old Game Center - Pac-Man 2: The New Adventures
Pac-Man's House
Pac-Man's House - Pac-Man 2: The New Adventures
Pac-Man's Room
Pac-Man's Room - Pac-Man 2: The New Adventures
Park
Park - Pac-Man 2: The New Adventures
Station St.
Station St. - Pac-Man 2: The New Adventures
Stock Farm
Stock Farm - Pac-Man 2: The New Adventures
Village Way
Village Way - Pac-Man 2: The New Adventures
Intro, Title Screen and Main Menu
Intro, Title Screen and Main Menu - Pinball Dreams
Hollywood Logo Area
Hollywood Logo Area - Pink Goes to Hollywood
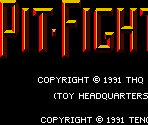
Title & Game Over Screens
Title & Game Over Screens - Pit-Fighter
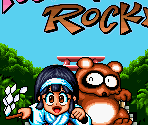
Main Menu
Main Menu - Pocky and Rocky
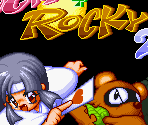
Main Menu
Main Menu - Pocky and Rocky 2
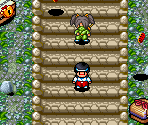
Stage 2: Exotic Country Road
Stage 2: Exotic Country Road - Pocky and Rocky 2
Stage 2: Exotic Country Road (Bonus Area)
Stage 2: Exotic Country Road (Bonus Area) - Pocky and Rocky 2
City Circuit 1
City Circuit 1 - Power Rangers Zeo: Battle Racers
City Circuit 2
City Circuit 2 - Power Rangers Zeo: Battle Racers
City Circuit 4
City Circuit 4 - Power Rangers Zeo: Battle Racers
City Circuit 5
City Circuit 5 - Power Rangers Zeo: Battle Racers
Enemies Town 1
Enemies Town 1 - Power Rangers Zeo: Battle Racers
Enemies Town 2
Enemies Town 2 - Power Rangers Zeo: Battle Racers
Grand Canyon 1
Grand Canyon 1 - Power Rangers Zeo: Battle Racers
Grand Canyon 2
Grand Canyon 2 - Power Rangers Zeo: Battle Racers
Rangers Base 1
Rangers Base 1 - Power Rangers Zeo: Battle Racers
Rangers Base 2
Rangers Base 2 - Power Rangers Zeo: Battle Racers
South Island 1
South Island 1 - Power Rangers Zeo: Battle Racers
South Island 2
South Island 2 - Power Rangers Zeo: Battle Racers
South Island 3
South Island 3 - Power Rangers Zeo: Battle Racers
Stage 1
Stage 1 - Push-Over
Round 1-1
Round 1-1 - Puzzle'n Desu! (JPN)
Character Portraits
Character Portraits - Rock 'n Roll Racing
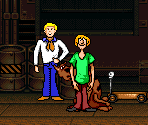
Ice Cream Truck Area
Ice Cream Truck Area - Scooby-Doo Mystery
Ship's Barrels Area
Ship's Barrels Area - Scooby-Doo Mystery
Ship's Crates Area
Ship's Crates Area - Scooby-Doo Mystery
Ship's Dark Hall
Ship's Dark Hall - Scooby-Doo Mystery
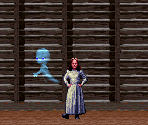
Ship's Kitchen 1
Ship's Kitchen 1 - Scooby-Doo Mystery
Ship's Main Hall 1
Ship's Main Hall 1 - Scooby-Doo Mystery
Ship's Main Hall 2
Ship's Main Hall 2 - Scooby-Doo Mystery
Balloon
Balloon - Snoopy Concert
Barber Cutscene Background
Barber Cutscene Background - Snoopy Concert
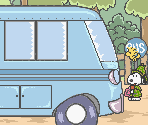
Buses
Buses - Snoopy Concert
Camp
Camp - Snoopy Concert
Camp Cabin Cutscene Background
Camp Cabin Cutscene Background - Snoopy Concert
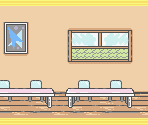
Camp Cabin Interior 1
Camp Cabin Interior 1 - Snoopy Concert
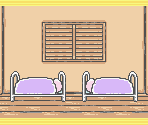
Camp Cabin Interior 2
Camp Cabin Interior 2 - Snoopy Concert
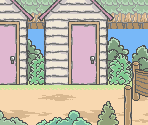
Camp Cabins
Camp Cabins - Snoopy Concert
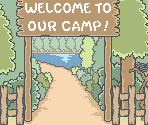
Camp Entrance
Camp Entrance - Snoopy Concert
Camp Lake
Camp Lake - Snoopy Concert
Charlie Brown's House Cutscene Background
Charlie Brown's House Cutscene Background - Snoopy Concert
City 1
City 1 - Snoopy Concert
City 2
City 2 - Snoopy Concert
Fishing Shop Cutscene Background
Fishing Shop Cutscene Background - Snoopy Concert
Flower Shop Cutscene Background
Flower Shop Cutscene Background - Snoopy Concert
Green Door Classroom
Green Door Classroom - Snoopy Concert
Ice Cream Shop Cutscene Background
Ice Cream Shop Cutscene Background - Snoopy Concert
Linus Stage 1
Linus Stage 1 - Snoopy Concert
Linus Stage 2
Linus Stage 2 - Snoopy Concert
Linus's House Cutscene Background
Linus's House Cutscene Background - Snoopy Concert
Movie Theater Cutscene Background
Movie Theater Cutscene Background - Snoopy Concert
Outside the School
Outside the School - Snoopy Concert
Purple Door Classroom
Purple Door Classroom - Snoopy Concert
School Entrance
School Entrance - Snoopy Concert
School Hall
School Hall - Snoopy Concert
Schroeder Stage 1
Schroeder Stage 1 - Snoopy Concert
Schroeder Stage 2
Schroeder Stage 2 - Snoopy Concert
Schroeder Stage 3
Schroeder Stage 3 - Snoopy Concert
Schroeder Stage 4
Schroeder Stage 4 - Snoopy Concert
Schroeder Stage 5
Schroeder Stage 5 - Snoopy Concert
Schroeder Stage 6
Schroeder Stage 6 - Snoopy Concert
Schroeder Stage 7
Schroeder Stage 7 - Snoopy Concert
Title Screen
Title Screen - Snoopy Concert
Town
Town - Snoopy Concert
Yellow Door Classroom
Yellow Door Classroom - Snoopy Concert
Overworld Map Overlay
Overworld Map Overlay - Super Adventure Island II
Poka-Poka Island - Inside The Tree
Poka-Poka Island - Inside The Tree - Super Adventure Island II
Battle Stage 01: Normal Zone
Battle Stage 01: Normal Zone - Super Bomberman
Battle Stage 02: Western Zone
Battle Stage 02: Western Zone - Super Bomberman
Battle Stage 03: Bomb Zone
Battle Stage 03: Bomb Zone - Super Bomberman
Battle Stage 04: Jump Zone
Battle Stage 04: Jump Zone - Super Bomberman
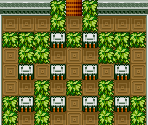
Battle Stage 05: Belt Zone
Battle Stage 05: Belt Zone - Super Bomberman
Battle Stage 06: Tunnel Zone
Battle Stage 06: Tunnel Zone - Super Bomberman
Battle Stage 07: Duel Zone
Battle Stage 07: Duel Zone - Super Bomberman
Battle Stage 08: Flower Zone
Battle Stage 08: Flower Zone - Super Bomberman
Battle Stage 09: Light Zone
Battle Stage 09: Light Zone - Super Bomberman
Battle Stage 10: Power Zone
Battle Stage 10: Power Zone - Super Bomberman
Battle Stage 11: Warp Zone
Battle Stage 11: Warp Zone - Super Bomberman
Battle Stage 12: Speed Zone
Battle Stage 12: Speed Zone - Super Bomberman
Stage 1-1
Stage 1-1 - Super Bomberman
Stage 1-2
Stage 1-2 - Super Bomberman
Stage 1-3
Stage 1-3 - Super Bomberman
Stage 1-4
Stage 1-4 - Super Bomberman
Stage 1-5
Stage 1-5 - Super Bomberman
Stage 1-6
Stage 1-6 - Super Bomberman
Stage 1-7
Stage 1-7 - Super Bomberman
Stage 2-1
Stage 2-1 - Super Bomberman
Stage 2-2
Stage 2-2 - Super Bomberman
Stage 2-3
Stage 2-3 - Super Bomberman
Stage 2-4
Stage 2-4 - Super Bomberman
Stage 2-5
Stage 2-5 - Super Bomberman
Stage 2-6
Stage 2-6 - Super Bomberman
Stage 2-7
Stage 2-7 - Super Bomberman
Stage 3-1
Stage 3-1 - Super Bomberman
Stage 3-2
Stage 3-2 - Super Bomberman
Stage 3-3
Stage 3-3 - Super Bomberman
Stage 3-4
Stage 3-4 - Super Bomberman
Stage 3-5
Stage 3-5 - Super Bomberman
Stage 3-6
Stage 3-6 - Super Bomberman
Stage 3-7
Stage 3-7 - Super Bomberman
Stage 4-1
Stage 4-1 - Super Bomberman
Stage 4-2
Stage 4-2 - Super Bomberman
Stage 4-3
Stage 4-3 - Super Bomberman
Stage 4-4
Stage 4-4 - Super Bomberman
Stage 4-5
Stage 4-5 - Super Bomberman
Stage 4-6
Stage 4-6 - Super Bomberman
Stage 4-7
Stage 4-7 - Super Bomberman
Stage 6-1
Stage 6-1 - Super Bomberman
Stage 6-2
Stage 6-2 - Super Bomberman
Stage 6-3
Stage 6-3 - Super Bomberman
Stage 6-4
Stage 6-4 - Super Bomberman
Stage 6-5
Stage 6-5 - Super Bomberman
Stage 6-6
Stage 6-6 - Super Bomberman
Stage 6-7
Stage 6-7 - Super Bomberman
World 1 Boss Arena
World 1 Boss Arena - Super Bomberman
World 2 Boss Arena
World 2 Boss Arena - Super Bomberman
World 3 Boss Arena
World 3 Boss Arena - Super Bomberman
World 4 Boss Arena
World 4 Boss Arena - Super Bomberman
World 5 Boss Arena (With Crowd)
World 5 Boss Arena (With Crowd) - Super Bomberman
World 5 Boss Arena (Without Crowd)
World 5 Boss Arena (Without Crowd) - Super Bomberman
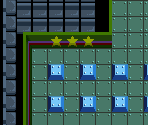
World 6 Boss Arena
World 6 Boss Arena - Super Bomberman
Battle Stage 01
Battle Stage 01 - Super Bomberman 2
Battle Stage 02
Battle Stage 02 - Super Bomberman 2
Battle Stage 03
Battle Stage 03 - Super Bomberman 2
Battle Stage 04
Battle Stage 04 - Super Bomberman 2
Battle Stage 05
Battle Stage 05 - Super Bomberman 2
Battle Stage 06
Battle Stage 06 - Super Bomberman 2
Battle Stage 07
Battle Stage 07 - Super Bomberman 2
Battle Stage 08
Battle Stage 08 - Super Bomberman 2
Battle Stage 09
Battle Stage 09 - Super Bomberman 2
Battle Stage 10
Battle Stage 10 - Super Bomberman 2
Battle Stage 11
Battle Stage 11 - Super Bomberman 2
Battle Stage 12
Battle Stage 12 - Super Bomberman 2
Main Menu
Main Menu - Super Bomberman 2
Robot Boss Arena
Robot Boss Arena - Super Bomberman 2
Stage 1-1
Stage 1-1 - Super Bomberman 2
Stage 1-2
Stage 1-2 - Super Bomberman 2
Stage 1-3
Stage 1-3 - Super Bomberman 2
Stage 1-4
Stage 1-4 - Super Bomberman 2
Stage 1-5
Stage 1-5 - Super Bomberman 2
Stage 1-6
Stage 1-6 - Super Bomberman 2
Stage 2-1
Stage 2-1 - Super Bomberman 2
Stage 2-2
Stage 2-2 - Super Bomberman 2
Stage 2-3
Stage 2-3 - Super Bomberman 2
Stage 2-4
Stage 2-4 - Super Bomberman 2
Stage 2-5
Stage 2-5 - Super Bomberman 2
Stage 2-6
Stage 2-6 - Super Bomberman 2
Stage 3-1
Stage 3-1 - Super Bomberman 2
Stage 3-2
Stage 3-2 - Super Bomberman 2
Stage 3-3
Stage 3-3 - Super Bomberman 2
Stage 3-4
Stage 3-4 - Super Bomberman 2
Stage 3-5
Stage 3-5 - Super Bomberman 2
Stage 3-6
Stage 3-6 - Super Bomberman 2
Stage 4-1
Stage 4-1 - Super Bomberman 2
Stage 4-2
Stage 4-2 - Super Bomberman 2
Stage 4-3
Stage 4-3 - Super Bomberman 2
Stage 4-4
Stage 4-4 - Super Bomberman 2
Stage 4-5
Stage 4-5 - Super Bomberman 2
Stage 4-6
Stage 4-6 - Super Bomberman 2
Stage 5-1
Stage 5-1 - Super Bomberman 2
Stage 5-2
Stage 5-2 - Super Bomberman 2
Stage 5-3
Stage 5-3 - Super Bomberman 2
Stage 5-4
Stage 5-4 - Super Bomberman 2
Stage 5-5
Stage 5-5 - Super Bomberman 2
Stage 5-6
Stage 5-6 - Super Bomberman 2
World 1 Boss Arena
World 1 Boss Arena - Super Bomberman 2
World 2 Boss Arena
World 2 Boss Arena - Super Bomberman 2
World 3 Boss Arena
World 3 Boss Arena - Super Bomberman 2
World 4 Boss Arena
World 4 Boss Arena - Super Bomberman 2
World 5 Boss Arena
World 5 Boss Arena - Super Bomberman 2
Battle Stage 01: BlockBuster
Battle Stage 01: BlockBuster - Super Bomberman 3
Battle Stage 02: Merry Go Round
Battle Stage 02: Merry Go Round - Super Bomberman 3
Battle Stage 03: Splish Splash
Battle Stage 03: Splish Splash - Super Bomberman 3
Battle Stage 04: Peekaboo
Battle Stage 04: Peekaboo - Super Bomberman 3
Battle Stage 05: Slip n' Slide
Battle Stage 05: Slip n' Slide - Super Bomberman 3
Battle Stage 06: Move n' Groove
Battle Stage 06: Move n' Groove - Super Bomberman 3
Battle Stage 07: Sandman
Battle Stage 07: Sandman - Super Bomberman 3
Battle Stage 08: Spitfire
Battle Stage 08: Spitfire - Super Bomberman 3
Battle Stage 09: Seesaw
Battle Stage 09: Seesaw - Super Bomberman 3
Battle Stage 10: Swamp Boogie
Battle Stage 10: Swamp Boogie - Super Bomberman 3
Battle Stage 11: Superstar
Battle Stage 11: Superstar - Super Bomberman 3
Battle Stage 12: Happy Happy
Battle Stage 12: Happy Happy - Super Bomberman 3
Battleship (1/7)
Battleship (1/7) - Super Bomberman 3
Battleship (2/7)
Battleship (2/7) - Super Bomberman 3
Battleship (3/7)
Battleship (3/7) - Super Bomberman 3
Battleship (4/7)
Battleship (4/7) - Super Bomberman 3
Battleship (5/7)
Battleship (5/7) - Super Bomberman 3
Battleship (6/7)
Battleship (6/7) - Super Bomberman 3
Battleship (7/7)
Battleship (7/7) - Super Bomberman 3
Battleship Boss Arena
Battleship Boss Arena - Super Bomberman 3
Deep Sea Area 1 (1/2)
Deep Sea Area 1 (1/2) - Super Bomberman 3
Deep Sea Area 1 (2/2)
Deep Sea Area 1 (2/2) - Super Bomberman 3
Deep Sea Area 2 (1/2)
Deep Sea Area 2 (1/2) - Super Bomberman 3
Deep Sea Area 2 (2/2)
Deep Sea Area 2 (2/2) - Super Bomberman 3
Deep Sea Area 3 (1/3)
Deep Sea Area 3 (1/3) - Super Bomberman 3
Deep Sea Area 3 (2/3)
Deep Sea Area 3 (2/3) - Super Bomberman 3
Deep Sea Area 3 (3/3)
Deep Sea Area 3 (3/3) - Super Bomberman 3
Deep Sea Area 4 (1/2)
Deep Sea Area 4 (1/2) - Super Bomberman 3
Deep Sea Area 4 (2/2)
Deep Sea Area 4 (2/2) - Super Bomberman 3
Deep Sea Boss Arena
Deep Sea Boss Arena - Super Bomberman 3
Deep Sea Hub
Deep Sea Hub - Super Bomberman 3
Firestorm Area 1
Firestorm Area 1 - Super Bomberman 3
Firestorm Area 2 (1/2)
Firestorm Area 2 (1/2) - Super Bomberman 3
Firestorm Area 2 (2/2)
Firestorm Area 2 (2/2) - Super Bomberman 3
Firestorm Area 3 (1/3)
Firestorm Area 3 (1/3) - Super Bomberman 3
Firestorm Area 3 (2/3)
Firestorm Area 3 (2/3) - Super Bomberman 3
Firestorm Area 3 (3/3)
Firestorm Area 3 (3/3) - Super Bomberman 3
Firestorm Area 4 (1/2)
Firestorm Area 4 (1/2) - Super Bomberman 3
Firestorm Area 4 (2/2)
Firestorm Area 4 (2/2) - Super Bomberman 3
Firestorm Boss Arena
Firestorm Boss Arena - Super Bomberman 3
Firestorm Hub
Firestorm Hub - Super Bomberman 3
Pyramid Area 1 (1/2)
Pyramid Area 1 (1/2) - Super Bomberman 3
Pyramid Area 1 (2/2)
Pyramid Area 1 (2/2) - Super Bomberman 3
Pyramid Area 2 (1/3)
Pyramid Area 2 (1/3) - Super Bomberman 3
Pyramid Area 2 (2/3)
Pyramid Area 2 (2/3) - Super Bomberman 3
Pyramid Area 2 (3/3)
Pyramid Area 2 (3/3) - Super Bomberman 3
Pyramid Area 3 (1/3)
Pyramid Area 3 (1/3) - Super Bomberman 3
Pyramid Area 3 (2/3)
Pyramid Area 3 (2/3) - Super Bomberman 3
Pyramid Area 3 (3/3)
Pyramid Area 3 (3/3) - Super Bomberman 3
Pyramid Area 4 (1/3)
Pyramid Area 4 (1/3) - Super Bomberman 3
Pyramid Area 4 (2/3)
Pyramid Area 4 (2/3) - Super Bomberman 3
Pyramid Area 4 (3/3)
Pyramid Area 4 (3/3) - Super Bomberman 3
Pyramid Boss Arena
Pyramid Boss Arena - Super Bomberman 3
Pyramid Hub
Pyramid Hub - Super Bomberman 3
Swamp Attack Area 1
Swamp Attack Area 1 - Super Bomberman 3
Swamp Attack Area 2
Swamp Attack Area 2 - Super Bomberman 3
Swamp Attack Area 3 (1/2)
Swamp Attack Area 3 (1/2) - Super Bomberman 3
Swamp Attack Area 3 (2/2)
Swamp Attack Area 3 (2/2) - Super Bomberman 3
Swamp Attack Area 4 (1/2)
Swamp Attack Area 4 (1/2) - Super Bomberman 3
Swamp Attack Area 4 (2/2)
Swamp Attack Area 4 (2/2) - Super Bomberman 3
Swamp Attack Boss Arena
Swamp Attack Boss Arena - Super Bomberman 3
Swamp Attack Hub
Swamp Attack Hub - Super Bomberman 3
Winterland Area 1 (1/3)
Winterland Area 1 (1/3) - Super Bomberman 3
Winterland Area 1 (2/3)
Winterland Area 1 (2/3) - Super Bomberman 3
Winterland Area 1 (3/3)
Winterland Area 1 (3/3) - Super Bomberman 3
Winterland Area 2 (1/3)
Winterland Area 2 (1/3) - Super Bomberman 3
Winterland Area 2 (2/3)
Winterland Area 2 (2/3) - Super Bomberman 3
Winterland Area 2 (3/3)
Winterland Area 2 (3/3) - Super Bomberman 3
Winterland Area 3 (1/3)
Winterland Area 3 (1/3) - Super Bomberman 3
Winterland Area 3 (2/3)
Winterland Area 3 (2/3) - Super Bomberman 3
Winterland Area 3 (3/3)
Winterland Area 3 (3/3) - Super Bomberman 3
Winterland Area 4 (1/4)
Winterland Area 4 (1/4) - Super Bomberman 3
Winterland Area 4 (2/4)
Winterland Area 4 (2/4) - Super Bomberman 3
Winterland Area 4 (3/4)
Winterland Area 4 (3/4) - Super Bomberman 3
Winterland Area 4 (4/4)
Winterland Area 4 (4/4) - Super Bomberman 3
Winterland Boss Arena
Winterland Boss Arena - Super Bomberman 3
Winterland Hub
Winterland Hub - Super Bomberman 3
Area 1 Boss Arena
Area 1 Boss Arena - Super Bomberman 4 (JPN)
Area 1 Robot Boss Arena
Area 1 Robot Boss Arena - Super Bomberman 4 (JPN)
Area 1-1
Area 1-1 - Super Bomberman 4 (JPN)
Area 1-2
Area 1-2 - Super Bomberman 4 (JPN)
Area 1-3
Area 1-3 - Super Bomberman 4 (JPN)
Area 1-4
Area 1-4 - Super Bomberman 4 (JPN)
Area 1-5
Area 1-5 - Super Bomberman 4 (JPN)
Area 1-6
Area 1-6 - Super Bomberman 4 (JPN)
Area 2 Boss Arena
Area 2 Boss Arena - Super Bomberman 4 (JPN)
Area 2 Robot Boss Arena
Area 2 Robot Boss Arena - Super Bomberman 4 (JPN)
Area 2-1
Area 2-1 - Super Bomberman 4 (JPN)
Area 2-2
Area 2-2 - Super Bomberman 4 (JPN)
Area 2-3
Area 2-3 - Super Bomberman 4 (JPN)
Area 2-4
Area 2-4 - Super Bomberman 4 (JPN)
Area 2-5
Area 2-5 - Super Bomberman 4 (JPN)
Area 2-6
Area 2-6 - Super Bomberman 4 (JPN)
Area 3 Boss Arena
Area 3 Boss Arena - Super Bomberman 4 (JPN)
Area 3 Robot Boss Arena
Area 3 Robot Boss Arena - Super Bomberman 4 (JPN)
Area 3-1
Area 3-1 - Super Bomberman 4 (JPN)
Area 3-2
Area 3-2 - Super Bomberman 4 (JPN)
Area 3-3
Area 3-3 - Super Bomberman 4 (JPN)
Area 3-4
Area 3-4 - Super Bomberman 4 (JPN)
Area 3-5
Area 3-5 - Super Bomberman 4 (JPN)
Area 3-6
Area 3-6 - Super Bomberman 4 (JPN)
Area 4 Boss Arena
Area 4 Boss Arena - Super Bomberman 4 (JPN)
Area 4 Robot Boss Stage
Area 4 Robot Boss Stage - Super Bomberman 4 (JPN)
Area 4-1
Area 4-1 - Super Bomberman 4 (JPN)
Area 4-2
Area 4-2 - Super Bomberman 4 (JPN)
Area 4-3
Area 4-3 - Super Bomberman 4 (JPN)
Area 4-4
Area 4-4 - Super Bomberman 4 (JPN)
Area 4-5
Area 4-5 - Super Bomberman 4 (JPN)
Area 4-6
Area 4-6 - Super Bomberman 4 (JPN)
Area 5 Boss Arena
Area 5 Boss Arena - Super Bomberman 4 (JPN)
Areas 5-1 to 5-3
Areas 5-1 to 5-3 - Super Bomberman 4 (JPN)
Areas 5-4 and 5-5
Areas 5-4 and 5-5 - Super Bomberman 4 (JPN)
Battle Stage 01
Battle Stage 01 - Super Bomberman 4 (JPN)
Battle Stage 02
Battle Stage 02 - Super Bomberman 4 (JPN)
Battle Stage 03
Battle Stage 03 - Super Bomberman 4 (JPN)
Battle Stage 04
Battle Stage 04 - Super Bomberman 4 (JPN)
Battle Stage 05
Battle Stage 05 - Super Bomberman 4 (JPN)
Battle Stage 06
Battle Stage 06 - Super Bomberman 4 (JPN)
Battle Stage 07
Battle Stage 07 - Super Bomberman 4 (JPN)
Battle Stage 08
Battle Stage 08 - Super Bomberman 4 (JPN)
Battle Stage 09
Battle Stage 09 - Super Bomberman 4 (JPN)
Battle Stage 10
Battle Stage 10 - Super Bomberman 4 (JPN)
Battle Stage 11
Battle Stage 11 - Super Bomberman 4 (JPN)
Battle Stage 12
Battle Stage 12 - Super Bomberman 4 (JPN)
Battle Stage 02
Battle Stage 02 - Super Bomberman 5 (JPN)
Battle Stage 03
Battle Stage 03 - Super Bomberman 5 (JPN)
Battle Stage 04
Battle Stage 04 - Super Bomberman 5 (JPN)
Battle Stage 05
Battle Stage 05 - Super Bomberman 5 (JPN)
Battle Stage 06
Battle Stage 06 - Super Bomberman 5 (JPN)
Battle Stage 07
Battle Stage 07 - Super Bomberman 5 (JPN)
Battle Stage 08
Battle Stage 08 - Super Bomberman 5 (JPN)
Battle Stage 09
Battle Stage 09 - Super Bomberman 5 (JPN)
Battle Stage 11
Battle Stage 11 - Super Bomberman 5 (JPN)
Battle Stage 12
Battle Stage 12 - Super Bomberman 5 (JPN)
Battle Stage 13
Battle Stage 13 - Super Bomberman 5 (JPN)
Bomber Woof Boss Arena
Bomber Woof Boss Arena - Super Bomberman 5 (JPN)
Dave Bomber Boss Arena
Dave Bomber Boss Arena - Super Bomberman 5 (JPN)
Zone 1-01
Zone 1-01 - Super Bomberman 5 (JPN)
Zone 1-02
Zone 1-02 - Super Bomberman 5 (JPN)
Zone 1-03
Zone 1-03 - Super Bomberman 5 (JPN)
Zone 1-04
Zone 1-04 - Super Bomberman 5 (JPN)
Zone 1-06
Zone 1-06 - Super Bomberman 5 (JPN)
Zone 1-12
Zone 1-12 - Super Bomberman 5 (JPN)
Zone 1-13
Zone 1-13 - Super Bomberman 5 (JPN)
Zone 2-08
Zone 2-08 - Super Bomberman 5 (JPN)
Zone 2-10
Zone 2-10 - Super Bomberman 5 (JPN)
Zone 2-12
Zone 2-12 - Super Bomberman 5 (JPN)
Zone 3-04
Zone 3-04 - Super Bomberman 5 (JPN)
Zone 3-08
Zone 3-08 - Super Bomberman 5 (JPN)
Zone 3-11
Zone 3-11 - Super Bomberman 5 (JPN)
China Town
China Town - Super Bonk / Super B.C. Kid / Super Genjin
Underground Bonus Room (World 1-1/2-1/7-1)
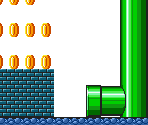
Underground Bonus Room (World 1-1/2-1/7-1) - Super Mario All-Stars: Super Mario Bros. & The Lost Levels
World 1-1
World 1-1 - Super Mario All-Stars: Super Mario Bros. & The Lost Levels
Stage 1-1 (1)
Stage 1-1 (1) - Super Mario All-Stars: Super Mario Bros. 2
Stage 1-1 (2)
Stage 1-1 (2) - Super Mario All-Stars: Super Mario Bros. 2
Stage 1-1 (3)
Stage 1-1 (3) - Super Mario All-Stars: Super Mario Bros. 2
Hills
Hills - Super Mario All-Stars: Super Mario Bros. 3
Waterfalls
Waterfalls - Super Mario All-Stars: Super Mario Bros. 3
World 1-1
World 1-1 - Super Mario All-Stars: Super Mario Bros. 3
World 1-1 (Sub Area)
World 1-1 (Sub Area) - Super Mario All-Stars: Super Mario Bros. 3
World 1-2
World 1-2 - Super Mario All-Stars: Super Mario Bros. 3
World 1-2 (Sub Area)
World 1-2 (Sub Area) - Super Mario All-Stars: Super Mario Bros. 3
World 1-3
World 1-3 - Super Mario All-Stars: Super Mario Bros. 3
World 1-3 (Sub Area)
World 1-3 (Sub Area) - Super Mario All-Stars: Super Mario Bros. 3
World 1-4 (1/2)
World 1-4 (1/2) - Super Mario All-Stars: Super Mario Bros. 3
World 1-4 (2/2)
World 1-4 (2/2) - Super Mario All-Stars: Super Mario Bros. 3
Item Roulette
Item Roulette - Super Mario Kart
Introduction
Introduction - Super Mario RPG: Legend of the Seven Stars
Title Screens & Star Road Destruction
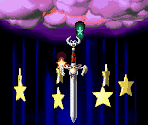
Title Screens & Star Road Destruction - Super Mario RPG: Legend of the Seven Stars
#1 Iggy's Castle (1/2)
#1 Iggy's Castle (1/2) - Super Mario World
#1 Iggy's Castle (2/2)
#1 Iggy's Castle (2/2) - Super Mario World
Blue Switch Palace (1/1)
Blue Switch Palace (1/1) - Super Mario World
Donut Ghost House (1/3)
Donut Ghost House (1/3) - Super Mario World
Donut Ghost House (2/3)
Donut Ghost House (2/3) - Super Mario World
Donut Ghost House (3/3)
Donut Ghost House (3/3) - Super Mario World
Donut Ghost House (Alternative Exit)
Donut Ghost House (Alternative Exit) - Super Mario World
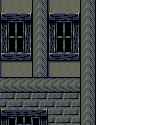
Donut Plains 3 - Switch Off
Donut Plains 3 - Switch Off - Super Mario World
Donut Plains 3 - Switch On
Donut Plains 3 - Switch On - Super Mario World
Donut Secret 1
Donut Secret 1 - Super Mario World
Donut Secret 1 (Sub Area)
Donut Secret 1 (Sub Area) - Super Mario World
Donut Secret 2
Donut Secret 2 - Super Mario World
Donut Secret 2 (Sub Area)
Donut Secret 2 (Sub Area) - Super Mario World
Forest Secret Area
Forest Secret Area - Super Mario World
Ghost House Exit
Ghost House Exit - Super Mario World
Green Switch Palace (1/1)
Green Switch Palace (1/1) - Super Mario World
Green Switch Palace (2/2)
Green Switch Palace (2/2) - Super Mario World
Keyhole Effect
Keyhole Effect - Super Mario World
Red Switch Palace (1/1)
Red Switch Palace (1/1) - Super Mario World
Red Switch Palace (2/2)
Red Switch Palace (2/2) - Super Mario World
Soda Lake (1/2)
Soda Lake (1/2) - Super Mario World
Soda Lake (2/2)
Soda Lake (2/2) - Super Mario World
Star World 5
Star World 5 - Super Mario World
Title Screen
Title Screen - Super Mario World
Top Secret Area
Top Secret Area - Super Mario World
Vanilla Secret 3 (1/2)
Vanilla Secret 3 (1/2) - Super Mario World
World Map
World Map - Super Mario World
World Map (Spriteless, Alternate Palette)
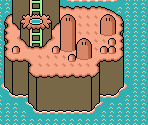
World Map (Spriteless, Alternate Palette) - Super Mario World
World Map (Spriteless)
World Map (Spriteless) - Super Mario World
Yellow Switch Palace (1/1)
Yellow Switch Palace (1/1) - Super Mario World
Yellow Switch Palace (2/2)
Yellow Switch Palace (2/2) - Super Mario World
Yoshi's Island 3
Yoshi's Island 3 - Super Mario World
Yoshi's Island 3 (Sub Area)
Yoshi's Island 3 (Sub Area) - Super Mario World
Yoshi's Island 4 (1/2)
Yoshi's Island 4 (1/2) - Super Mario World
Yoshi's Island 4 (2/2)
Yoshi's Island 4 (2/2) - Super Mario World
Yoshi's Island 4 (Sub Area)
Yoshi's Island 4 (Sub Area) - Super Mario World
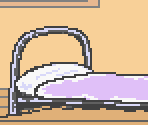
Bedroom
Bedroom - Super Troll Islands
Title Screen
Title Screen - The Tick
Title Screen
Title Screen - Timon & Pumbaa's Jungle Games